
When you are growing your own microgreens, there are several things that you need to remember. These plants need to have a pH between 5 and 6. Firstly, make sure that your growing pad is fully saturated and that you mist it ten times before sprinkling the seeds. After that, you must scatter the seeds onto the growing pad. You can use as little as 2 tablespoons of dry seed for small varieties or a quarter cup for larger ones.
After gaining some knowledge, it is possible to start growing your own microgreens. Ted Chang shows how to grow microgreens in punnets from recycled strawberry liner. You don't have to have a backyard or a green thumb to grow them. Even your kitchen window sills could be used! However, they should not grow rapidly. If you are unsure, you might try different varieties.
The nutrient mixture must provide enough nutrients to the plants. For the best growth of microgreens, you must ensure that the nutrient solutions contains all necessary micronutrients. The best trays for microgreens are those that have been specifically designed for this purpose. If you're not comfortable working with containers, use a growing mat. Microgreens do not require you to use heavy soil. To keep the pots moist, simply wrap them in plastic wrap.
The process of growing your own Microgreens is easy if you follow these tips. You can harvest your microgreens in about 10 to 14 working days. But some varieties may be ready much sooner. It's important to keep your growing tray cool. You can place the tray in the sun for the first few days if you have a compostable container. The microgreens can also be stored in the refrigerator.
Microgreens can be grown at home. It's easy and safe. Microgreens have all the nutrients you need to maintain a healthy body. They can be grown on your rooftop or windowsill. The process is surprisingly easy. If you're not confident enough in your greens' growing capabilities, you can hire a professional to help you with the process. You will be rewarded, with nutritious and delicious microgreens that can be added to your diet.
These microgreens are extremely portable and nutritious. Microgreens are ideal for packing lunches as they come in a variety of sizes and shapes. Microgreens can be a quick and simple way to get your daily dose of fresh vegetables. Just remember to choose nutritious seeds and follow the directions on the package. You should also enjoy your new crop. You might consider starting a microgreens business. This could be an opportunity to start a successful startup business.
Whether you're retired or not, a microgreens growing business can keep you busy and help feed the world. Not only will you see results in a matter of days, but your microgreens could also grow very quickly. Some of the most well-known microgreen crops are: arugula; basil; celery; cabbage, endive. radish. Microgreens are an excellent way to make a living as a retired person. You can also plant your own heirlooms.
FAQ
Can I grow vegetables indoors
Yes, it is possible to grow vegetables in a greenhouse during winter. You will need to purchase a greenhouse or grow lights. Before purchasing a greenhouse or grow lights, be sure to consult the local laws.
When to plant flowers?
Planting flowers is best done during springtime when temperatures are milder and the soil is moist. If you live outside of a warm climate, it is best not to plant flowers until the first frost. The ideal temperature for growing plants indoors is around 60 degrees Fahrenheit.
What time should I plant herbs in my garden?
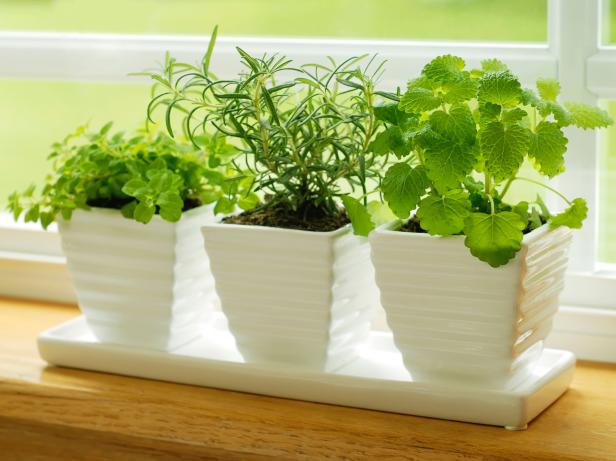
The ideal time to plant herbs is springtime, when the soil temperature is 55°F. They should be in full sun to get the best results. To grow basil indoors you need to place the seedlings inside pots that have been filled with potting soil. Once they start sprouting leaves, keep them out from direct sunlight. Once the plants begin to grow properly, you should move them into bright indirect lights. After approximately three weeks, transplant them into individual containers. Continue to water them as needed.
How many hours of light does a plant need?
It depends on the plant. Some plants need 12 hours direct sunlight each day. Others prefer 8 hours of indirect sunlight. Most vegetables require 10 hours direct sunlight in a 24-hour period.
Statistics
- According to the National Gardening Association, the average family with a garden spends $70 on their crops—but they grow an estimated $600 worth of veggies! - blog.nationwide.com
- It will likely be ready if a seedling has between 3 and 4 true leaves. (gilmour.com)
- Most tomatoes and peppers will take 6-8 weeks to reach transplant size so plan according to your climate! - ufseeds.com
- Today, 80 percent of all corn grown in North America is from GMO seed that is planted and sprayed with Roundup. - parkseed.com
External Links
How To
Use organic fertilizers in your garden
Organic fertilizers are made from natural substances such as manure, compost, fish emulsion, seaweed extract, guano, and blood meal. The term organic refers to the use of non-synthetic materials for their production. Synthetic fertilizers are chemicals that are used in industrial processes. Synthetic fertilizers are used widely in agriculture as they supply nutrients quickly and efficiently to plants without the need for laborious preparation. However, synthetic fertilizers present risks to both the environment- and human health. To produce, synthetic fertilizers require a lot of energy and water. Due to runoff, synthetic fertilizers can pollute both groundwater as well as surface waters. This is a problem for wildlife and humans alike.
There are several types of organic fertilizers:
* Manure is produced when livestock eat nitrogen-rich foods (a plant nutrient). It contains bacteria, enzymes, and other substances that break down the waste into simple compounds which can be easily absorbed by plants.
* Compost - a mixture of decaying leaves, grass clippings, vegetable scraps, and animal manure. It is rich with nitrogen, phosphorus. potassium, calcium. magnesium. sulfur. iron. copper. manganese. molybdenum. chlorine. and carbon. It is highly porous so it can retain moisture well and release nutrients slowly.
* Fish Emulsion- A liquid product that is made from fish oil. It works similarly to soap in that it dissolves oils and fats. It also contains trace elements like phosphorous, Nitrogen, and other elements.
* Seaweed Extract – A concentrated solution containing minerals extracted from kelp. It is a good source of vitamins A, C, iron, and iodine.
* Guano is the excrement of seabirds and bats. It contains nitrogen and phosphorous, potassium as well sulfate, salt, chloride, carbon, sodium, magnesium and other minerals.
* Blood Meal is the meat and bones of animals that have been slaughtered. It is high in protein, making it suitable for feeding poultry and other livestock. It also contains phosphorus, potassium, nitrogen, and trace minerals.
Combine equal parts of compost, manure and/or fish-emulsion to make organic fertilizer. Mix well. If you don’t own all three ingredients, one can be substituted for the other. You can mix one part of the fish emulsion with two portions of compost if you don't have enough.
To apply the fertilizer, spread it evenly over the soil using a shovel or tiller. About a quarter of a cup of the fertilizer is needed per square foot. You will need more fertilizer to see signs and growth every two weeks.